
Nginx常用命令和场景配置
编辑nginx常用命令
-
测试配置文件
- 安装路径下的
/nginx/sbin/nginx -t
- 安装路径下的
-
启动命令
- 安装路径下的
/nginx/sbin/nginx
- 安装路径下的
-
停止命令
- 安装路径下的
/nginx/sbin/nginx -s stop或者.${nginx}/sbin/nginx -s quit
- 安装路径下的
-
重启命令
- 安装路径下的
/nginx/sbin/nginx -s reload
- 安装路径下的
-
查看进程命令
ps -ef |grep nginx
-
平滑重启
kill -HUB [nginx主进程号,也就是查看进程命令查到的pid]
增加防火墙访问权限
- CentOS 6
1. sudo vim /etc/sysconfig/iptables
2.  -A INPUT -p tcp -m state --state NEW -m tcp --dport 80 -j ACCEPT
3. 保存退出
4. 重启防火墙 sudo service iptables restart
- CentOS 7
   sudo firewall-cmd --zone=public --add-port=3000/tcp -permanent
    sudo firewall-cmd --reload
虚拟域名的配置以及测试验证
配置步骤
-
编辑
sudo vim /usr/local/nginx/conf/nginx.conf -
在server节点下增加
include vhost/*.conf, 将和 nginx.conf 同级目录下的vhost下的配置文件导入 -
保存退出

-
在
/usr/local/nginx/conf/目录新建vhost文件夹 即/usr/local/nginx/conf/vhost* 在vhost目录创建域名转发配置文件,详情参考下文nginx详情配置 -
启动(重启)验证
-
启动
${nginx}/sbin/nginx -
重启
${nginx}/sbin/nginx -s reload
${nginx} 代表安装在系统中的路径,例如 /usr/local/nginx
-
访问验证
-
使用默认80端口访问验证
http://localhost:80或http://127.0.0.1:80
nginx配置实例
指向端口
server {
    listen 80;
    server_name api.imisty.cn;
    client_max_body_size 200M;
    access_log /usr/local/nginx/logs/access.log combined;
    index index.html index.htm index.jsp index.php;
    #root /devsoft/apache-tomcat-7.0.73/webapps/blog;
    #error_page 404 /404.html;
    if ( $query_string ~* ".*[\;'\<\>].*" ){
            return 404;
            }
    location / {
            proxy_pass http://127.0.0.1:8080/;
            add_header Access-Control-Allow-Origin '*';
            }
    }
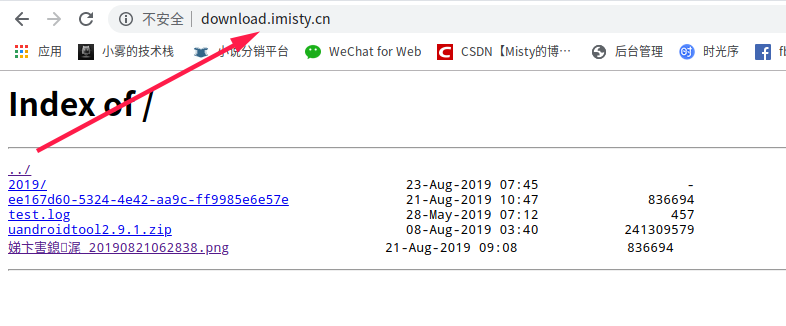
指向目录 :本段配置指向download目录 ,autoindex on代表自动创建索引
     server {
        listen 80;
        autoindex on;
        server_name download.imisty.cn;
        access_log /usr/local/nginx/logs/access.log combined;
        index index.html index.htm index.jsp index.php;
        #error_page 404 /404.html;
        if ( $query_string ~* ".*[\;'\<\>].*" ){
            return 404;
        }

        location / {
            root /download;
            add_header Access-Control-Allow-Origin *;
        }
    }
既指向端口又指向目录
server {
    listen 80;
    autoindex on;
    server_name imisty.cn www.imisty.cn;
    access_log /usr/local/nginx/logs/access.log combined;
    index index.html index.htm index.jsp index.php;
    if ( $query_string ~* ".*[\;'\<\>].*" ){
            return 404;
            }

    location = / {
            root /product/blog/dist/view;
            index index.html;
    }

    location ~ .*\.html$ {
            root /product/blog/dist/view;
            index index.html;
    }

    location / {
            proxy_pass http://127.0.0.1:8080/;
            }

    location ~ .*\.(gif|jpg|jpeg|png|bmp|swf|flv|ico)$ {
            proxy_pass http://127.0.0.1:8080;
            expires 30d;
            }

    location ~ .*\.(js|css)?$ {
            proxy_pass http://127.0.0.1:8080;
            expires 7d;
            }
    }
注意 nginx的域名配置指向目录的时候,
autoindex on|off属性,可以设置是否创建索引,设置成off,首页403,但是内容依旧可以访问,只是没有暴露索引
补充一段线上的wordpress博客配置,这里省去了https部分,属于比较标准的即指向端口有指向目录的配置
server {
            listen          80;
            server_name     www.imisty.cn imisty.cn;
            #非常关键不然 http也可以访问
            return 301 https://www.imisty.cn$request_uri;
            root            /var/www/html/wordpress;
            index           index.html index.htm index.php;
            client_max_body_size 100M;
            proxy_intercept_errors on;

            if (!-e $request_filename) {
                rewrite ^(.*)$ /index.php$1 last;
            }

            location ~ .*\.php(\/.*)*$ {
                include fastcgi.conf;
                fastcgi_index  index.php;
                fastcgi_pass  127.0.0.1:9000;

                fastcgi_connect_timeout 300;

                fastcgi_send_timeout 300;

                fastcgi_read_timeout 300;

            }

            error_log  logs/error_wordpress.log;
            access_log logs/misty.log combined;
        }
- 配置完成或者修改配置之后一定要记得
./nginx -s reload重新加载才会生效;
本地虚拟域名配置(修改host)注意事项
可以配置域名转发,但是一定要配置host,并且使host生效之后才可以,设置完成之后要重启浏览器

Linux 修改host
-
sudo vim /etc/hosts
-
添加好对应的域名和ip,这样访问域名的时候不会访问真实的域名
例如 :
10.211.55.6 image.misty.com 127.0.0.1 s.imsge.comWindows
-
进入
C:\windows\system32\drivers\etc -
用记事本打开hosts文件
-
添加好对应的域名以及IP (和Linux环境下修改host一样)
-
保存退出
关于目录访问403 的问题
- 实际配置过程中,将root目录及其子目录的路径配置给nginx,访问出现403 ,常规目录可以
关于重定向过多的问题
- 用nginx配置指向 本地的localhost:8080/talker ,出现重定向次数过多的情况,猜想是因为层级关系导致,直接访问8080端口即可,不需要直接访问路径下面的应用
小确幸
每一丝灵感都值得被记录,每一笔记录都是成长,每一点成长都值得欢呼
博主个人站: www.imisty.cn
CSDN博客: https://blog.csdn.net/lookinthefog
博客园 :https://imist.cnblogs.com/
希望能够认识一些热爱技术的小伙伴,欢迎友链接哟
- 0
- 0
-
分享